Getting blood drawn is often necessary for medical tests and procedures. However, it can also lead to many anxious patients. Using butterfly needles for phlebotomy offers benefits in comfort and safety compared to standard straight needles.
As a health professional, it’s crucial to follow proper techniques for its use, removal, and disposal to protect both patients and yourself.
This guide will reveal key steps and best practices at each stage. We’ll cover:
- Proper insertion and use of the said needles
- Safe removal techniques to minimize pain and bruising
- Effective sterilization and disposal protocols
- Ways to prevent needlestick injuries and infection risks
- Documentation requirements for continued safety and care
Without further ado, let’s now dive into the intricacies of proper handling of this specific needle.
Proper Technique for Inserting and Removing Butterfly Needles
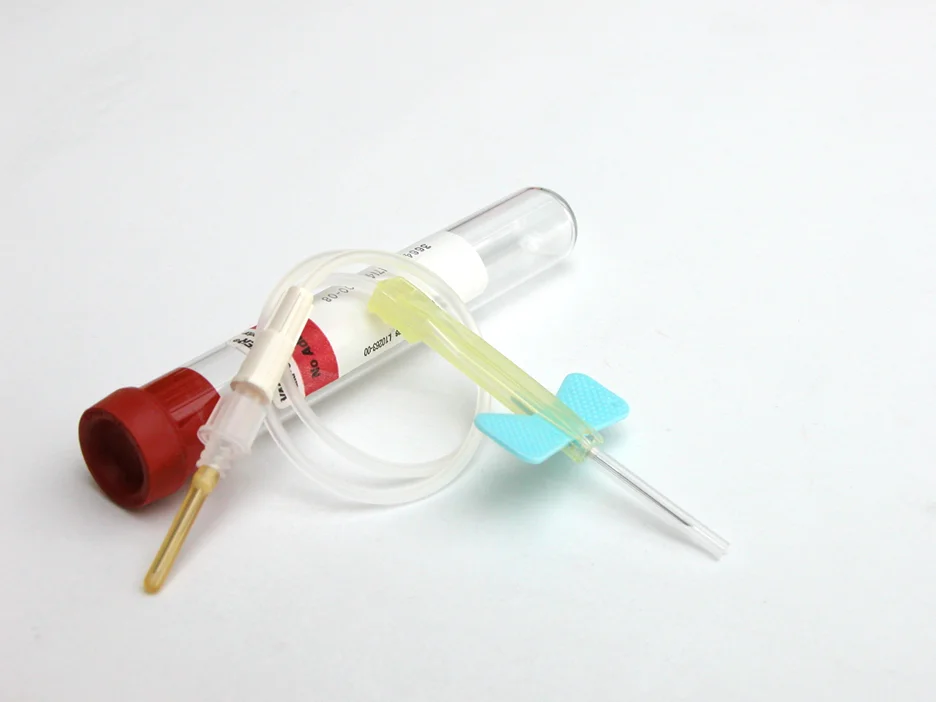
Butterfly needles offer advantages over straight needles for blood draws, especially for patients with small or fragile veins. The flexible tubing and low-profile wings allow for more comfortable positioning and less vein trauma. However, careful technique is required to gain these benefits.
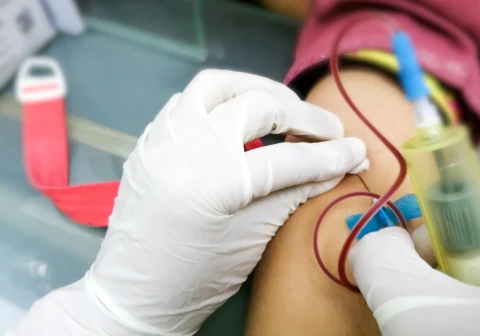
How do you insert the needle correctly?
- First, select the smallest gauge needle appropriate for the vein and required blood volumes. Typical gauges are 21g to 25g. The lower the gauge, the thinner the needle.
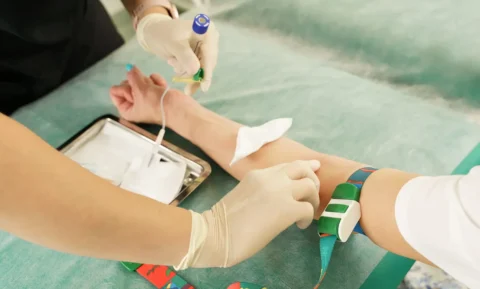
- Prepare the skin at the insertion site with an alcohol wipe or antiseptic and allow it to fully dry. This helps prevent infection risk.
- Apply the tourniquet 2-4 inches above the anticipated puncture site for no longer than 1 minute. This will help engorge the vein without causing hemoconcentration.
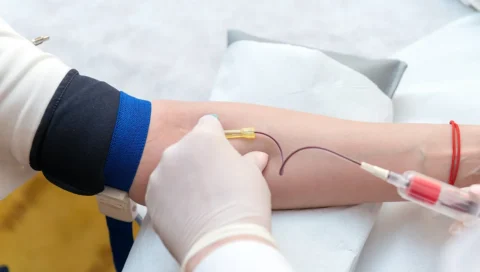
- Insert the bevel of the needle facing up and at a 10-30 degree angle depending on vein depth. This allows smooth entry along the axis of the vein.
- Once sufficient flashback blood is seen, lower the needle angle closer to the skin and gently advance it 1-2mm further to stabilize it within the vein. Avoid probing multiple times.
- Secure the butterfly wings and tubing with tape or transparent dressing. Attach collection tubes or syringes.
Always handle needles with care and dispose of them immediately after use, as detailed later in this guide.
When it comes time for removal, follow these steps:
How do you take out a butterfly needle safely?
- First, remove any tape or dressing securing the needle. Grasp the wings of the butterfly needle and loosen from the skin.
- Stabilize the vein by holding tissue on either side of the insertion site between your non-dominant thumb and finger.
- Have the patient relax arm muscles and breathe slowly to minimize vein movement.
- In one smooth motion, pull the needle straight out at the same angle it went in while stabilizing the surrounding skin. Do not change direction.
- Once removed, apply gentle pressure to the site with gauze to stop any bleeding.
- Check that the needle safely retracts into its protective sheath or cover using the safety mechanism. Dispose of it immediately in a sharps container.
- Apply a fresh bandage over the gauze at the puncture site if needed for additional compression.
Proper patient positioning, vein stability, and smooth technique help prevent bruising or blowout of the vein when removing the needles. This minimizes discomfort and complications.
What precautions help prevent infections from butterfly needle use?
Meticulous sterile technique is vital anytime skin is breached with a needle. Several factors reduce infection risks with needle blood draws:
- Follow aseptic protocols when handling needles before and after use, including wearing well-fitting, non-sterile gloves and performing proper hand hygiene.
- Thoroughly disinfect the insertion site prior to access with an alcohol/chlorhexidine wipe.
- When available, use pre-packaged sterile needle kits. Avoid unnecessary exposure.
- Once inserted, do not palpate or re-enter the site. This can introduce bacteria.
- Engage safety features like re-sheathing devices to cover needles immediately after use to prevent needlestick injuries.
- Never recap needles or otherwise compromise sterile barriers.
- Discard in a sharps container without delay or manipulation of the needle.
- Clearly explain signs of infection for patients to monitor after the blood draw.
By maintaining sterility throughout the process, the risk of introducing pathogens into the bloodstream via needle puncture is substantially reduced. Proper sterile protocols protect both patients and healthcare staff.
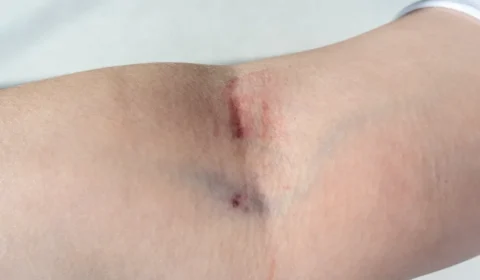
How can bruising and complications be minimized when removing butterfly needles?
Hematoma or blown veins are common concerns with phlebotomy. However, several techniques can reduce bruising risk:
- Use the smallest gauge needle possible that can still draw adequate blood flow. 23g or 25g is ideal for butterfly needles.
- Thoroughly anchor the butterfly tubing to limit needle movement in the vein.
- Withdraw the needle smoothly in one steady motion without changing the angle.
- Apply firm pressure to the site for 2-5 minutes after removal to prevent bleeding.
- Instruct patients to keep the arm still initially and avoid bending or strenuous activity.
- Apply ice packs if bruising occurs to constrict blood vessels and minimize spread.
- Communicate expectations around potential bruising to patients and monitor the site.
- Consider using a butterfly needle for patients with small or fragile veins to reduce complications.
- Ensure proper training on vein selection, anchor use, smooth needle removal, and site pressure.
- Dispose of sharps properly in puncture-resistant containers to prevent needle injuries.
- Prepare a quiet, clean, well-lit phlebotomy area with proper equipment.
- Follow quality control procedures to minimize errors.
- Engage patients and address any concerns promptly.
Proper patient communication helps set expectations around potential bruising or discomfort following needle removal. Reassure them it’s generally minimal and temporary. Lastly, monitoring the site and promptly reporting any concerns is also advised.
Proper Disposal and Documentation for Continued Butterfly Needle Safety
Safe protocols don’t end once a butterfly needle is removed from a patient’s arm. Proper handling and disposal are critical to prevent needlestick injuries or biohazard risks.
Additionally, thorough documentation ensures you and other staff remain informed of the procedure details.
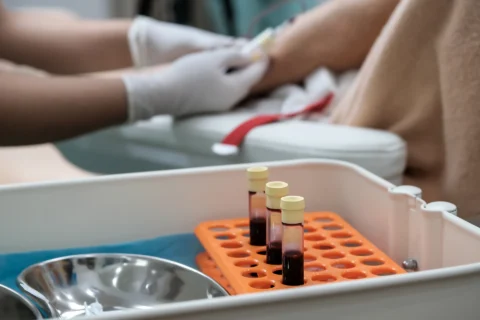
What is the right way to dispose of used needles?
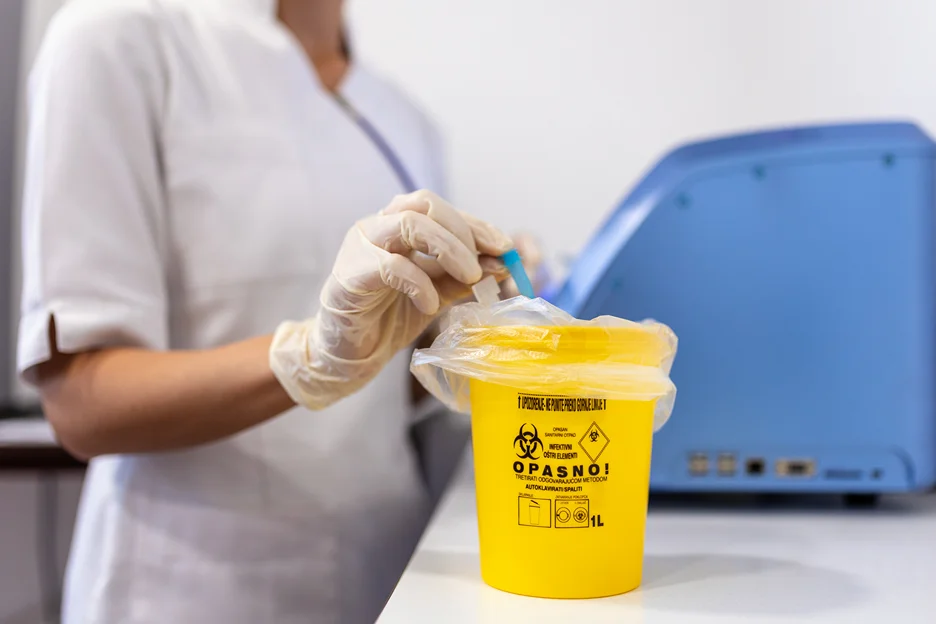
- Used needles must go straight from the patient into an approved sharps container. Never leave them loose or uncapped.
- Do not try to recap, purposely bend, or break off the needles before disposal. This raises needlestick risk.
- Importantly, be sure to activate the safety feature on butterfly needles to properly retract the needle before disposal. This added step helps prevent accidental needlestick injuries.
- For butterfly needles without automatic retraction, grasp the wings in one hand while holding the needle hub/barrel in the other. Apply pressure to retract the needle into the sheath using the proper manual technique. Never attempt to recap needles.
- Note that butterfly needles account for a disproportionate number of needlestick injuries when not properly retracted prior to disposal. The long tubing and “wings” make them prone to catching on surfaces or dangling loose if not secured.
- Engage any other safety mechanisms like protective sheaths before disposal.
- Close and properly label sharps containers when filled 3⁄4 full to prevent overfilling.
- Follow all protocols regarding sharps containers in your healthcare setting. Many require incineration or professional hazardous waste disposal.
- If an accidental needlestick occurs, follow injury response protocols immediately. Report the incident.
Adhering to needle disposal best practices helps mitigate many safety risks that can persist even after use. It also complies with regulations.
What documentation is needed for safe needle use?
Proper documentation is essential both for the patient’s continued care and for tracking butterfly needle practices. Be sure to:
- Record the procedure, site, needle gauge/type used, date, time, name of person performing the procedure, and any difficulties in the patient’s medical chart.
- Note any complications or adverse events during needle insertion, dwell time, or removal.
- If accidental needlestick, log the date, time, circumstances, and actions taken in response.
- Document when safety mechanisms are activated and the needle is securely contained after use. Follow facility protocol for reporting needlestick injuries.
- Track quantities of needle inventory and reconcile with disposal logs. Investigate any discrepancies. Perform regular audits to ensure compliance with documentation procedures.
Thorough documentation helps identify opportunities for optimal patient care, to meet regulatory requirements and ensures accountability for safe protocols. It also communicates key details to other providers caring for the patient subsequently. Complete documentation is crucial for
Your Complete Resource for Safe Butterfly Needle Practices
Removing and disposing of butterfly needles properly is a clear patient safety imperative. However, following best practices also protects healthcare staff from needlestick injuries or infectious exposures.
By honing sterile technique, controlled removal, secure containment, and complete documentation around this kind of needles, both risks and anxieties around blood draws can be significantly reduced.
Take the guesswork out of your practice with high-quality butterfly needles and phlebotomy supplies from our store.